Integrate with your Data Catalog
Bring your own data catalog to start monitoring assets. DataOculus provides a user-friendly interface to configure, manage, and monitor all your data catalog assets at one place.
DataOculus Metadata Catalog dashboard showing all configured catalog providers
Overview
The DataOculus catalog management interface provides:
- Visual Configuration - Configure catalog providers through an intuitive UI
- Real-time Monitoring - Track sync status and progress in real-time
- Automated Scheduling - Set up recurring sync schedules with cron expressions
- Multi-Provider Support - Connect to multiple catalog platforms simultaneously
- Centralized Management - Manage all catalog integrations from one place
Getting Started
Accessing the Catalog Management Interface
Navigate to Settings > Metadata Catalog in your DataOculus dashboard to access the catalog management interface.
 Main catalog management interface with existing configurations
Supported Catalog Providers
DataOculus supports integration with the following data catalog platforms:
✅ Fully Supported
- Google Data Catalog - Enterprise data discovery and metadata management for all your Google Cloud data assets
- DataHub - Open-source metadata platform from LinkedIn
- OpenMetadata - Open-source data discovery and collaboration platform
- Kaggle Data Catalog - Kaggle's public datasets
- Unity Data Catalog - Unified Data Catalog from Databricks
🚧 Coming Soon
- Azure Data Catalog - Microsoft's data discovery service
- AWS Data Catalog - Amazon's metadata management service
⚙️ Setting Up a New Catalog Integration
Step 1: Start a New Configuration
To begin, click the Add New Configuration button located on your catalog interface.
Screenshot: "Add New Configuration" button
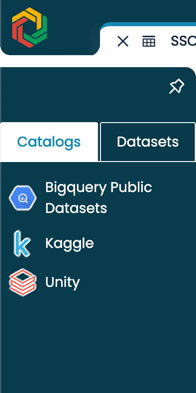
Step 2: Select Your Catalog Provider
From the dropdown menu, select the catalog provider you wish to integrate. Each provider has unique settings you'll need to configure.
Dropdown showing available catalog providers
Step 3: Enter Provider-Specific Settings
After selecting a provider, fill out the configuration form displayed. Settings vary depending on your chosen provider. For example:
🔹 Google Data Catalog Configuration
Fill out the following required fields:
- Project ID: Identifier of your Google Cloud project.
- Project Location: The geographic location associated with your project.
- Service Account Key: Upload the JSON credentials for your service account. (Credentials are securely stored.)
DataHub
DataHub configuration form
Required Fields:
- URL - DataHub instance URL (e.g.,
https://your-datahub.company.com)
Unity Data Catalog (Databricks)
Unity Data Catalog configuration form
Required Fields:
- Databricks Workspace URL - Your Databricks workspace URL
- Unity Catalog URL - Auto-populated based on workspace URL
- Personal Access Token - Databricks PAT (stored securely as secret)
Kaggle Data Catalog
Kaggle Data Catalog configuration form
Required Fields:
- Cookie - Kaggle session cookie for authentication
- X-XSRF Token - CSRF protection token
Step 4: Secure Secret Management
For sensitive fields like API keys and tokens, DataOculus provides secure secret storage:
Secure secret input and storage interface
- Enter your secret value in the input field
- Click "Set Secret" to securely store the credential
- The secret is encrypted and stored safely
- Only the secret path reference is saved in the configuration
Managing Existing Configurations
Configuration Overview Table
All configured catalog providers are displayed in an organized table with the following information:
Table showing all configured catalog providers with status and actions
Columns:
- Provider - The catalog platform (Google, DataHub, etc.)
- Name - Configuration display name
- Status - Real-time sync status with visual indicators
- Sync Schedule - Human-readable schedule description
- Actions - Edit, sync, and delete operations
Real-Time Status Monitoring
DataOculus provides real-time status updates for all catalog sync operations:
Different status indicators for catalog sync operations
Status Types:
- 🔄 Running - Sync currently in progress (auto-refreshing)
- ✅ Completed - Sync finished successfully
- ✅ Finished - Sync completed without errors
- ❌ Failed - Sync encountered errors
- ❌ Error - System error during sync
- ❓ Unknown - Status unavailable
Sync Scheduling
Setting Up Automated Sync
Configure recurring sync schedules using the visual cron editor:
Visual cron expression editor for scheduling automated syncs
Common Schedule Patterns:
- Daily at 1:00 PM -
0 13 * * * - Weekdays at 9:00 AM -
0 9 * * 1-5 - Every 6 hours -
0 */6 * * * - Weekly on Sundays -
0 2 * * 0
Manual Sync Operations
Start or stop sync operations manually using the action buttons:
Manual sync control buttons for immediate operations
Available Actions:
- ▶️ Start Sync - Begin immediate sync operation
- ⏸️ Pause/Stop - Stop currently running sync
- 🔄 Auto-refresh - Status updates every 30 seconds for running syncs
Configuration Management
Editing Configurations
Click the edit icon (✏️) to modify existing configurations:
Edit configuration form with sync scheduling options
Editable Elements:
- Connection parameters (URLs, credentials)
- Sync schedule settings
- Configuration name and description
- Advanced options and filters
Deleting Configurations
Remove configurations you no longer need:
Confirmation dialog for deleting catalog configurations
Safety Features:
- Confirmation dialog prevents accidental deletion
- Configuration details shown for verification
- Permanent removal from all systems
Common Issues & Solutions
Common issues and their solutions in the interface
Connection Issues:
- Verify network connectivity
- Check authentication credentials
- Validate URL endpoints
- Review firewall settings
Sync Failures:
- Check error logs for specific issues
- Verify permissions on source systems
- Monitor resource usage and limits
- Review data volume and timeout settings
Next Steps
Once your catalog integrations are configured and running:
- Explore Features - Discover advanced search and discovery capabilities
- Set up Data Quality - Implement automated quality monitoring
- Configure Governance - Establish data governance policies
- Train Your Team - Enable self-service data discovery
Need Help?
Available support resources and help documentation
- 📖 Documentation - Comprehensive guides and tutorials
- 💬 Community - User forums and discussions
- 🎓 Training - Interactive tutorials and webinars
- 🆘 Support - Direct technical assistance
Contact our support team for assistance with catalog configuration and troubleshooting.